Monday, January 27, 2014

{DIY} Vintage Circus Party

I recently blogged about my daughters vintage circus birthday party! I thought I would share some of the easy DIY things I made for the party that came out pretty cute!

I had really envisioned some glorious tiered birthday cake for the party. But that was out of my budget and also unrealistic. It was a small party with just a few people {mainly because our house just isn't that big} Everywhere I looked cakes were too expensive or not what I wanted. A sheet cake that was too much cake and an easy $20. I decided to just make cupcakes again since it was easier and cheaper like her pixie/pirate party last year. 
I didn't want to use the cupcake stand from last year. I wanted to try something different. I started looking for little cake stands. But again everything was out of my budget. I went to the Dollar Tree and got these cute glass plates and candlestick holders and some 9001 super glue at Joannes and made two very simple and inexpensive cake stands. VOILA!


From the beginning I knew I needed some kind of games. At least a couple right? It was a circus party. So I started collecting cans from dinner to make this cute bean bag toss game.
I got wrapping paper in the color scheme of the party from the dollar tree. I measured one of the labels on the wrapping paper to be an exact match. Then I just used scotch tape. One game down!


    I like using labels or signs throughout the party. It just adds a cute personal touch. I lucked out and found these little chalkboard stickers in the dollar bin at Michael's. It came with a set of 6 stickers and some chalk. They went along perfectly with the vintage theme! I got the black and gold 4x6 frames at the dollar tree and used some of my polka dot scrapbook party that I already had. Those were one of my favorite things of the party and the little gold elephants.


Anyone thankful for Pinterest?... I am!
I found this printable "pin the tail on the elephant" game.
All I had to do was save it to a flash drive and took it to Staples. 
I had them print an 18x14 size and it was only a couple of dollars. 
Then I taped it to a glittery gold trimmed poster board I got from Target. 
I also painted the elephant with gold metallic paint for fun.


It's always worth it to make things for these parties. It's fun and inexpensive. What types of things have you made for your parties? Leave a link in a comment I would love to see!
Share:

Wednesday, July 17, 2013

{Things I'm loving} Thrifting and Upcycling

Being a stay at home can probably get boring sometimes. Then add a part time job that's not even part time {photographer}. There are days where I need something to do. I don't like being extremely busy either. I don't like stress. I don't like rushing through everything. I love freedom to enjoy life. Now that it's summer I've thrown myself into projects and thrifting. I've been feeling very inspired in this place and in this house. I'm an old soul and I've always loved vintage things and mixing them together. I just never thought I could do it. That I could accomplish my ideal style of home decor. I feel like I'm finally coming into my own. My house is almost taking a full 180.. maybe like a 120/130. It's full of mix-matched things, different colors and patterns, while still having a theme throughout the house.

So my latest obsession has been craigslisting, and thrifting. There is so much stuff on the east coast that is more my style so I'm taking advantage. I may be going overboard but it's hard to stop with just one thing. I don't want to buy the cheap furniture from Target, or Wal-mart. Every single piece has broken or fallen apart from all the moves. So I'm being smarter this time. I'd say the majority of the pieces in my downstairs is thrifted in one way or another. Once everything is done to my satisfaction I will post a tour.

My latest has been chairs. Accent, desk ...whatever. Buying these kinds of chairs brand new can be in $100's and that's just not in my budget. Even though it would be easier. Thrifting or upcycling it you have the freedom to design it however you want. In the past year I've been collecting them. I'm sure it's been annoying the hubs. But he doesn't see what I see, they are little treasures to me! They also have a dual purpose and I can use it for my Photography


I got this chair back in March or April and I haven't even started on it yet. I got it at the Salvation Army for $10 haven't decided on color or fabric yet. That's why I've been dragging my feet.


This chair I just got recently of of craigslist for $35 it's definitely going to be more of a challenge for me since the upholstery is all ripped up and it might need to be stuffed too. But I have a vision for this one and I'm absolutely in love! It's a gorgeous chair, and so photogenic! :)
What things are you loving these days?


Share:

Tuesday, April 23, 2013

{DIY} Personalized Silhouette Cameo Frames

I've finally been able to catch up on some {DIY} projects that I've been wanting to do. I had really wanted some silhouette cameo frames for my house. I had searched all over for maybe some printable ones so I could do it inexpensively. After finding this similar project on camillestyles.com I put my two ideas together. She used them for place cards for a wedding. I figured I could do it for my frame idea.

So I took pictures of each of us. Evan, Riley and I against one of our walls. Doesn't have to be perfect just a profile picture.
Then I just printed them out in different sizes at Walgreens. I wasn't sure about which frames I would get.


I cut them out with small precision scissors {JoAnns} Make sure to go around all the features like nose and mouth.


I grabbed some extra spray paint that I had around doesn't have to be this type you can use any craft spray paint and all different colors. 

Flipped them over and sprayed the back. Don't spray too close or it will make it look drippy and looks funny.


It didn't take that long for it to dry. Maybe 10 min or so 


I picked scrapbook paper that would look good behind the silhouettes. You can pick any kind you like. I used 12x12 "I love you" paper from {Joanns}
I traced the glass from the different frames that I used. Three sheets of paper were just enough for 2 8x10 frames and 2 5x7 frames.


Placed the paper in the frames. Frames are from {Hobby Lobby}


I used scrapbooking double sided tape to tape the silhouettes onto the scrapbooking paper.


VOILA! Our very own Personalized Silhouette Cameo Frames for our Dining room. 


Share:

Friday, February 22, 2013

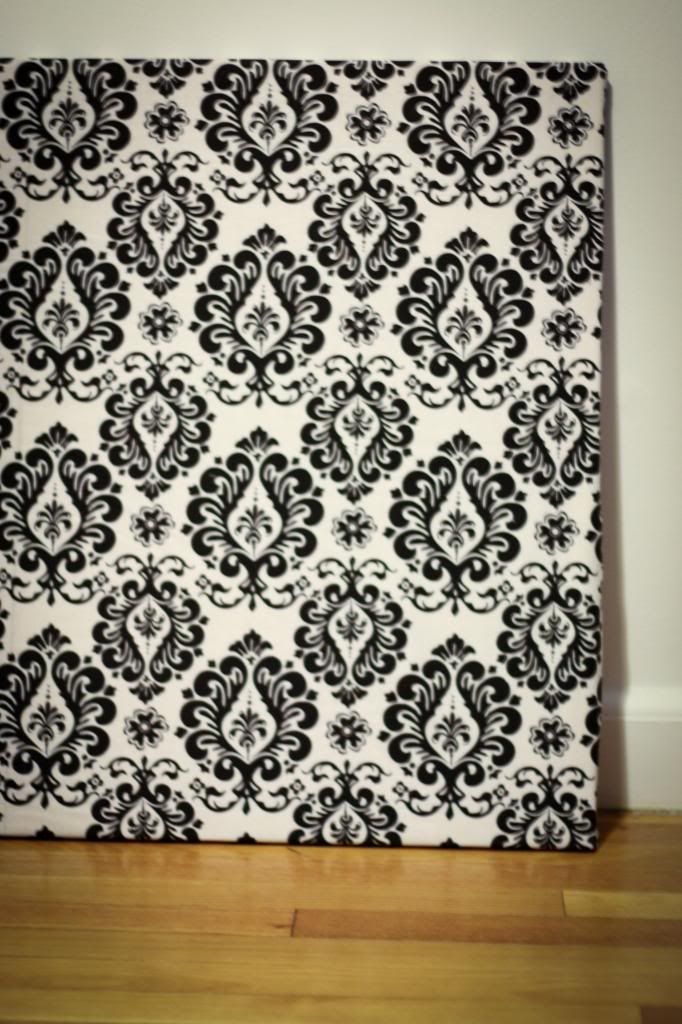
{DIY} Decorative/Covered bulletin boards

I took a break from Fashion Friday to show you guys all the projects I've been doing around the house. Don't worry I will catch up though, maybe even a whole week of just fashion.

I had this huge bulky type bulletin board that my mom gave me when she was cleaning out storage. I took it and used it for awhile in my office. It's just so huge and kind of ugly like most bulletin boards are right?
I used momentarily to put my necklaces up in my closet. After awhile that didn't work either. It's such a short closet. I had to fight through my clothes just to get to the board and it kept falling over. So I had to think of a new plan.
I was just going to sell it ......

But then I found an awesome easy idea on Pinterest. Pinterest of course is still a God-send. It makes it a one-stop place of all ideas and inspiration so you don't have to spend hours on the internet searching for ideas. Instead you just spend hours on pinterest :)

Why not cover your ugly bulletin board with decorative fabric to match your office theme or the rest of your home decor. It was such an easy and inexpensive project. {well easier if I had a better staple gun}. Here's where you can find more detailed instructions. http://www.markovadesign.com


What you'll need:

Fabric: {Depending on the size board.  I just got 1 yd of quilting fabric and that was just enough @ $5.99
Staple Gun/Staples: {Husband got the Ace brand for home projects. It would've been better with a heavy duty one to get through the wood frame} $16-$20 with the staples }
Bulletin board: {obviously, one with a frame and whatever size}
Upholstery tacks: {whatever style you want. I got black smooth ones @ $1.99 for 24 get plenty of these to get around the whole board}
Hanging Brackets


Measure 3" of fabric on each side


Staple along each side {since I had a bad staple gun I used a hammer too} Leave the corners open 

Fold corners in like a present and then staple them too

Finished covered bulletin board

Place the tacks 1" apart or however you like. Keep them evenly placed along the edge of board.
Again make sure you get plenty of the tacks to go all the way around your board. 


There you go! Done in just a few steps. My office is slowly coming together!
Happy Friday Everyone


Share:

Monday, September 17, 2012

DIY: {Lace Vases}

There is one important thing to know about me and that is .....I LOVE DIY! (Do it yourself) I've been cutting, pasting, drawing little crafts for a little while now. I just love it even more when you can make your own home decor. How great not to mention cheap is that?! In the last couple of years my projects have been far and in between sadly. So I decided in our new house I want to do more. Sky's the limit! In our old house I made these cute collage frames, basically a framed scrapbook page! I would have preferred them in a cute shadowbox, maybe another time. They turned out really cute! I still have them up in my house now!

So I had a little spare time this last week and wanted to attack these plane kinda boring vases I had. I bought them for a New Moon Party I had.  (Yes! Don't judge I am a twilight fan) I had made my own "Ruffle Tulips" which is on the cover of the book. Anyway, I had these two vases with ugly little white rocks in them just hanging out on my fireplace. So I sat there looking at them for days trying to think of what I wanted. I saw on Pinterest somewhere a cute mason jar wrapped in sheet music. Then I saw tons of vases with lace on them and loved that look too. So hey I combined them together! Why not?!
So off to the craft store I went. Instead of buying lace fabric and cutting it up I just bought lace ribbon/trim. It was so much cheaper for such a tiny job. I got fabric paper glue which said it could go on fabrics and dried clear. That was my first mistake. I couldn't get it to stick at all it kept sliding all around the vase. It was basically school white glue. So I got frustrated of course. Searched around online and got more ideas. Basically, it was either a hot glue gun or glue dots. However, the store (Joann's) didn't have glue dots. I was on a budget so I opted for the mini glue gun in a cute little pink color. The whole project cost maybe $10 minus the vases, which I don't remember how much they cost. Most likely pretty cheap because they were from Wal-Mart. For the sheet music I just got sheet music scrapbook paper. I would have preferred the real thing, but these turned out fine too and I can always take them out and put something else in.


Wal-Mart Vases


Mini Hot glue gun w/ glue sticks

Lace


Afterwards on my fireplace


{Directions}
Clean Vase
Hot Glue Gun w/ glue sticks

Lace of your choice
Sheet of paper of your choice

Lace: Glue along side the edge of the lace with vase upside down made it easier to hold. Slowly wrap around bottom of vase. Enough material so it overlaps a tiny bit then glue together.

Paper: Fold paper the shape of vase (cylinder shape) spread so it is as close the inside of the vase as possible. Measure then cut off extra paper from the top. Glue (paper glue) the edges of the paper then just insert it in the vase. It's that simple and can be inter-changeable. Hope you enjoy!
Share:
Blogger Template Created by pipdig